


Installing the Linksys EA8100 with the Configuration Wizard
Sure you've got the following before you start the installation process:
EA8100 through Linksys
One or more cables through Ethernet
A wireless computer or a laptop with only an Ethernet port (smartphone or tablet)
Starhub's active home internet
System Settings Browser Specifications and Linksys Smart Wi-Fi Access:
The most popular edition of Web Browsers
To understand how to set up the Linksys EA8100 using the Setup Wizard, follow the steps below.
Step 1:
Identify the StarHub equipment provided.
Scenario 1: Detach and uninstall the router if you have a separate modem and a standalone router.

Scenario 2: Leave it attached if you have a modem-router.
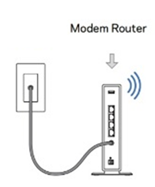
Step 2:
Attach the ethernet cable from your modem's LAN port to your Linksys EA8100's Internet (yellow) port.

Step 3:
Switch the equipment supplied by StarHub on and wait for 1 minute before the next move is taken.
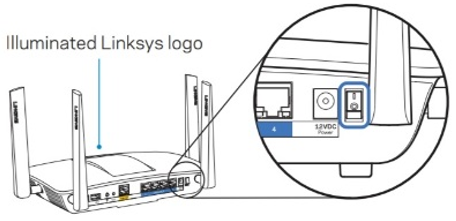
Step 4:
Attach and plug into an electrical socket the supplied power adapter into the Linksys EA8100.

Fast TIP: Make sure the power light (Linksys logo) of the Linksys EA8100 Setup is solid before proceeding to the next stage. To reset, press the power button on the back of the Linksys EA8100 if it does not light up.
NOTE: A standard StarHub Fiber link setup is given below.

Step 5:
Connect to the Linksys EA8100's default Wi-Fi settings using a smartphone or tablet. On the Linksys EA8100 product mark, the default Wi-Fi name and password are specified.

Step 6:
Start your web browser and in the address bar enter link sys smart wifi then click [Enter].
Quick TIP: If you are unable to start Smart Setup, you can enter the default IP address of the router, 192.168.10.1, in the browser's address bar.
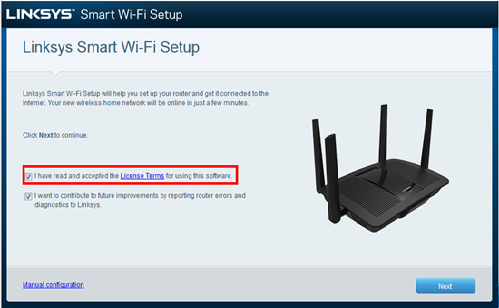
Step 7:
Check the box next to the license terms I have read and approved for the use of this program. To continue, then press Next.
NOTE: The Linksys EA8100 light will light up until you approve the license terms. Solid white implies that internet connections are open while blinking white implies that the internet is down.
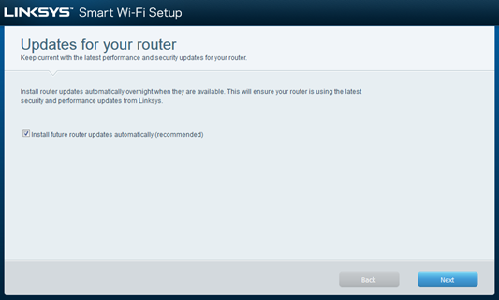
Step 8:
In the Router Updates window, Automatically Install Future Router Updates (Recommended) is checked by default for automatic updates. To monitor when to execute an update, you can uncheck it. After logging into the router's web-based setup page, you can also allow this option again. To continue, press NEXT.
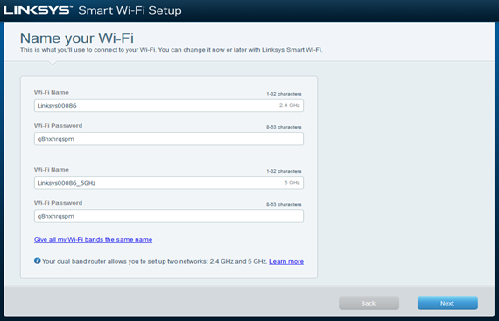
Step 9:
In the given fields, enter your desired Wi-Fi name and Wi-Fi password, then click Next.
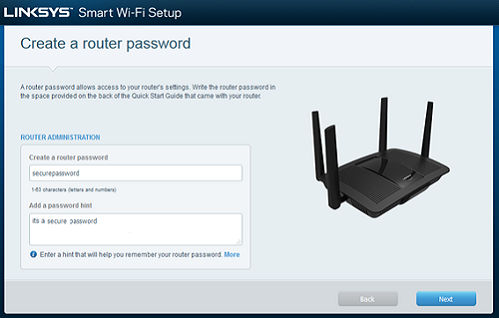
Step 10:
In the Build, a Router Password field, enter a router password and click Next.
Fast TIP: If the Add password hint option is displayed on your router, enter your preferred hint in the field given. In the future, this will help you recall your router password. Only when you want Local Access will your password hint appear.
Step 11:
Your router is set up if you see it! This means that your router is now successfully installed. The new Wi-Fi settings will be shown, as well as the router admin password. To complete the entire setup, click Next.
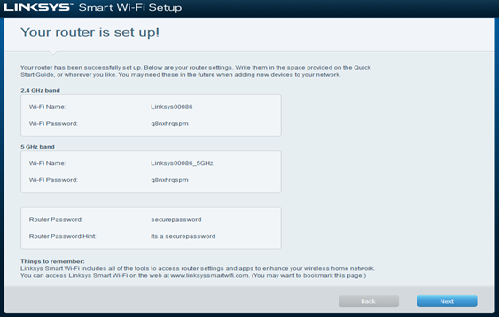
QUICK TIP: Make sure you write down the new settings in the fields given for future reference in the Quick Start Guide.
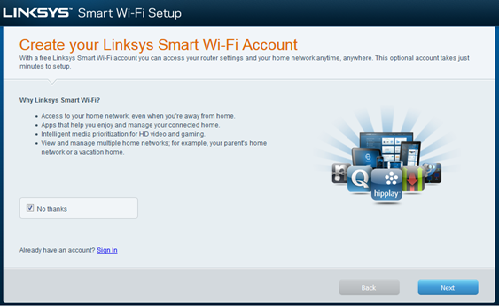
Step 12:
Your Wi-Fi appears to be working now. Next, to get access to Linksys Smart Wi-Fi software and the Linksys app that makes it easier to control and enjoy your home network, you can build a Linksys cloud account. Click here for guidance. Instead, click the Sign In icon if you already have an account.
Step 13:
By entering the router password you developed in Step 10, you can now access the web-based setup page of your router.
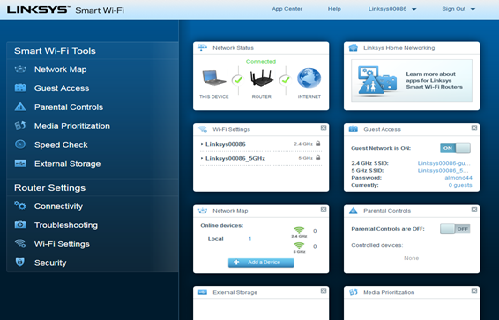
You can use the Linksys Smart Wi-Fi tools once you have signed in and set them according to your preferences.

Also read about:
How do I setup my Netgear WiFi Extender with WPS
Scrap your vehicle for cash Three reasons you need to tow away your junk car today
Places to travel around the Globe this 2021


More Stories
Difference Between Graphics and Video Card
What is Instagram History and marketing
What are Heat Sinks Functions Types More
Security Guide Keeping Your Small Business Safe
How to Run Windows Apps on Mac Desktop
Workstation Advantages and Disadvantages